按角色进行授权
在网络应用里,角色是用于处理 授权 和 许可 的常见方法。例如,通常会为管理员创建一个 Administrator 角色,相对于普通用户,他们拥有更多的权限和能力。
在此项目中,你将添加一个 用户管理 页面,仅对管理员们可见。如果普通用户试图访问它,将会看到错误提示。
添加用户管理页面
首先,创建一个新控制器:
Controllers/ManageUsersController.cs
using System;
using System.Linq;
using System.Threading.Tasks;
using Microsoft.AspNetCore.Mvc;
using Microsoft.AspNetCore.Authorization;
using Microsoft.AspNetCore.Identity;
using AspNetCoreTodo.Models;
using Microsoft.EntityFrameworkCore;

namespace AspNetCoreTodo.Controllers
{
    [Authorize(Roles = "Administrator")]
    public class ManageUsersController : Controller
    {
        private readonly UserManager<ApplicationUser>
            _userManager;

        public ManageUsersController(
            UserManager<ApplicationUser> userManager)
        {
            _userManager = userManager;
        }

        public async Task<IActionResult> Index()
        {
            var admins = (await _userManager
                .GetUsersInRoleAsync("Administrator"))
                .ToArray();

            var everyone = await _userManager.Users
                .ToArrayAsync();

            var model = new ManageUsersViewModel
            {
                Administrators = admins,
                Everyone = everyone
            };

            return View(model);
        }
    }
}
在 [Authorize] 属性里加入 Roles 字段,可以确保用户必须已经登录 并且 被分配了 Administrator 角色才能查看这个页面。
接下来,创建一个视图模型:
Models/ManageUsersViewModel.cs
using System.Collections.Generic;

namespace AspNetCoreTodo.Models
{
    public class ManageUsersViewModel
    {
        public ApplicationUser[] Administrators { get; set; }

        public ApplicationUser[] Everyone { get; set;}
    }
}
最后,为 action Index 创建一个名为Views/ManageUsers的文件夹和一个视图:
Views/ManageUsers/Index.cshtml
@model ManageUsersViewModel

@{
    ViewData["Title"] = "Manage users";
}

<h2>@ViewData["Title"]</h2>

<h3>Administrators</h3>

<table class="table">
    <thead>
        <tr>
            <td>Id</td>
            <td>Email</td>
        </tr>
    </thead>

    @foreach (var user in Model.Administrators)
    {
        <tr>
            <td>@user.Id</td>
            <td>@user.Email</td>
        </tr>
    }
</table>

<h3>Everyone</h3>

<table class="table">
    <thead>
        <tr>
            <td>Id</td>
            <td>Email</td>
        </tr>
    </thead>

    @foreach (var user in Model.Everyone)
    {
        <tr>
            <td>@user.Id</td>
            <td>@user.Email</td>
        </tr>
    }
</table>
启动程序,并以普通用户身份登录,尝试去访问一下 /ManageUsers 路径。你会见到这样的 拒绝访问 页面:
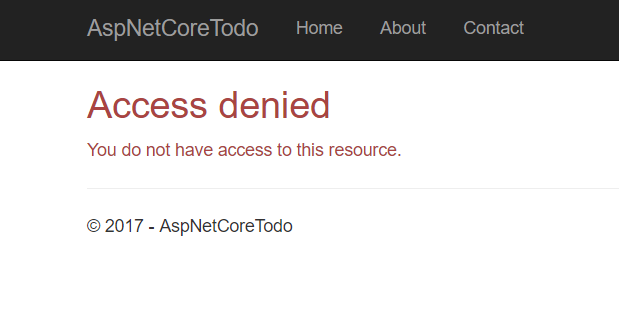
这是因为注册用户不会自动获得 Administrator 这个角色。
创建一个测试用的管理员账号
出于显而易见的安全因素,对于任何人来说,都不能自主的注册成为一个管理员账号。事实上,Administrator 这个角色,在数据库中尚不存在。
你可以在该应用程序第一次启动的时候,将这个 Administrator 角色外加一个测试用的管理员账号添加到数据库中。向数据库添加初始数据的行为,被称为初始化,或者 填充(seeding) 数据库。
在项目的根目录创建一个新类,取名为 SeedData:
SeedData.cs
using System;
using System.Linq;
using System.Threading.Tasks;
using AspNetCoreTodo.Models;
using Microsoft.AspNetCore.Identity;
using Microsoft.EntityFrameworkCore;
using Microsoft.Extensions.DependencyInjection;

namespace AspNetCoreTodo
{
    public static class SeedData
    {
        public static async Task InitializeAsync(
            IServiceProvider services)
        {
            var roleManager = services
                .GetRequiredService<RoleManager<IdentityRole>>();
            await EnsureRolesAsync(roleManager);

            var userManager = services
                .GetRequiredService<UserManager<ApplicationUser>>();
            await EnsureTestAdminAsync(userManager);
        }
    }
}
InitializeAsync() 方法使用一个 IServiceProvider(在Startup.ConfigureServices()方法中设置过的服务集合)从 ASP.NET Core Identity 中获取RoleManager和UserManager。
在InitializeAsync()方法下面再添加两个方法,第一个,EnsureRolesAsync()方法:
private static async Task EnsureRolesAsync(
    RoleManager<IdentityRole> roleManager)
{
    var alreadyExists = await roleManager
        .RoleExistsAsync(Constants.AdministratorRole);

    if (alreadyExists) return;

    await roleManager.CreateAsync(
        new IdentityRole(Constants.AdministratorRole));
}
此方法查看数据库里是否存在一个 Administrator 角色。如果没有,它就创建一个。为免反复地输入字符串 "Administrator",创建一个名为 Constants 的小类以保存它的值:
Constants.cs
namespace AspNetCoreTodo
{
    public static class Constants
    {
        public const string AdministratorRole = "Administrator";
    }
}
如果你愿意,也可以修改之前创建的
ManageUsersController使用这个常量值。
接下来是 EnsureTestAdminAsync() 方法:
SeedData.cs
private static async Task EnsureTestAdminAsync(
    UserManager<ApplicationUser> userManager)
{
    var testAdmin = await userManager.Users
        .Where(x => x.UserName == "admin@todo.local")
        .SingleOrDefaultAsync();

    if (testAdmin != null) return;

    testAdmin = new ApplicationUser
    {
        UserName = "admin@todo.local",
        Email = "admin@todo.local"
    };
    await userManager.CreateAsync(
        testAdmin, "NotSecure123!!");
    await userManager.AddToRoleAsync(
        testAdmin, Constants.AdministratorRole);
}
如果数据库里不存在一个用户名为 admin@todo.local 的用户,这个方法将创建它并给它一个临时的密码。在你初次登录之后,就应该改为一个更安全的密码。
接下来,你需要提醒你的程序,在它启动的时候,执行这个逻辑。修改Program.cs,并更新Main()去调用一个新的方法InitializeDatabase():
Program.cs
public static void Main(string[] args)
{
    var host = BuildWebHost(args);
    InitializeDatabase(host);
    host.Run();
}
然后,在Main()的下面添加这个新方法:
private static void InitializeDatabase(IWebHost host)
{
    using (var scope = host.Services.CreateScope())
    {
        var services = scope.ServiceProvider;

        try
        {
            SeedData.InitializeAsync(services).Wait();
        }
        catch (Exception ex)
        {
            var logger = services
                .GetRequiredService<ILogger<Program>>();
            logger.LogError(ex, "Error occurred seeding the DB.");
        }
    }
}
并把这个 using 语句添加到文件顶部:
using Microsoft.Extensions.DependencyInjection;
此方法获取SeedData.InitializeAsync()所需的服务集合,然后执行它以便初始化数据库。如果出现错误,将会记录一条错误日志。
因为
InitializeAsync()返回一个Task,就必须使用Wait()方法以确保它在应用程序启动前完成。你一般是用await做这件事,但是因为某些技术原因,你无法在Program方法中使用await。这是个罕见的例外 —— 所有其它地方你都应该用await!
当你再次启动程序,admin@todo.local 这个账号会被创建并被赋予 Administrator 角色。请尝试用这个账号登录,并浏览位于 http://localhost:5000/ManageUsers 的页面,你将看到一个列表,列出了本程序的所有注册用户。
作为练习,请在这个页面添加更多管理功能特性。例如,添加一个按钮,为管理员提供 删除一个用户 的功能。
在视图里查看认证状态
[Authorize] 属性让控制器里执行认证操作变得很方便,但是如果你需要在视图里进行认证操作呢?比如,在导航条上为登入的管理员用户显示一个“管理用户”的链接。
你可以把 UserManager 直接注入到视图里来进行这些操作。为保持你视图整洁有序,创建一个新的局部视图(partial view),以便在布局中的导航条里添加一个项目:
Views/Shared/_AdminActionsPartial.cshtml
@using Microsoft.AspNetCore.Identity
@using AspNetCoreTodo.Models

@inject SignInManager<ApplicationUser> signInManager
@inject UserManager<ApplicationUser> userManager

@if (signInManager.IsSignedIn(User))
{
    var currentUser = await userManager.GetUserAsync(User);

    var isAdmin = currentUser != null
        && await userManager.IsInRoleAsync(
            currentUser,
            Constants.AdministratorRole);

    if (isAdmin)
    {
        <ul class="nav navbar-nav navbar-right">
            <li>
                <a asp-controller="ManageUsers"
                   asp-action="Index">
                   Manage Users
                </a>
            </li>
        </ul>
    }
}
按惯例,通常把局部视图的名字以
_下划线开始,但这不是强制性的。
这个局部视图首先使用 SignInManager 判断用户是否已经登录。如果没有登录,其余的代码就都被跳过。如果这 是 个已登录用户,UserManager 就被用于查找用户详细信息,并用 IsInRoleAsync() 进行认证检查。如果所有检查都通过了,并且该用户是一个管理员,导航条上就会加入一个 Manage Users 链接。
要在主布局中包含这个局部视图,编辑 _Layout.cshtml 并在导航条部分添加:
Views/Shared/_Layout.cshtml
<div class="navbar-collapse collapse">
    <ul class="nav navbar-nav">
        <!-- existing code here -->
    </ul>
    @await Html.PartialAsync("_LoginPartial")
    @await Html.PartialAsync("_AdminActionsPartial")
</div>
如果你用管理员账号登录,将在右上角见到一个新的导航项:

Authorization with roles
Roles are a common approach to handling authorization and permissions in a web application. For example, it's common to create an Administrator role that gives admin users more permissions or power than normal users.
In this project, you'll add a Manage Users page that only administrators can see. If normal users try to access it, they'll see an error.
Add a Manage Users page
First, create a new controller:
Controllers/ManageUsersController.cs
using System;
using System.Linq;
using System.Threading.Tasks;
using Microsoft.AspNetCore.Mvc;
using Microsoft.AspNetCore.Authorization;
using Microsoft.AspNetCore.Identity;
using AspNetCoreTodo.Models;
using Microsoft.EntityFrameworkCore;

namespace AspNetCoreTodo.Controllers
{
    [Authorize(Roles = "Administrator")]
    public class ManageUsersController : Controller
    {
        private readonly UserManager<ApplicationUser>
            _userManager;

        public ManageUsersController(
            UserManager<ApplicationUser> userManager)
        {
            _userManager = userManager;
        }

        public async Task<IActionResult> Index()
        {
            var admins = (await _userManager
                .GetUsersInRoleAsync("Administrator"))
                .ToArray();

            var everyone = await _userManager.Users
                .ToArrayAsync();

            var model = new ManageUsersViewModel
            {
                Administrators = admins,
                Everyone = everyone
            };

            return View(model);
        }
    }
}
Setting the Roles property on the [Authorize] attribute will ensure that the user must be logged in and assigned the Administrator role in order to view the page.
Next, create a view model:
Models/ManageUsersViewModel.cs
using System.Collections.Generic;

namespace AspNetCoreTodo.Models
{
    public class ManageUsersViewModel
    {
        public ApplicationUser[] Administrators { get; set; }

        public ApplicationUser[] Everyone { get; set;}
    }
}
Finally, create a Views/ManageUsers folder and a view for the Index action:
Views/ManageUsers/Index.cshtml
@model ManageUsersViewModel

@{
    ViewData["Title"] = "Manage users";
}

<h2>@ViewData["Title"]</h2>

<h3>Administrators</h3>

<table class="table">
    <thead>
        <tr>
            <td>Id</td>
            <td>Email</td>
        </tr>
    </thead>

    @foreach (var user in Model.Administrators)
    {
        <tr>
            <td>@user.Id</td>
            <td>@user.Email</td>
        </tr>
    }
</table>

<h3>Everyone</h3>

<table class="table">
    <thead>
        <tr>
            <td>Id</td>
            <td>Email</td>
        </tr>
    </thead>

    @foreach (var user in Model.Everyone)
    {
        <tr>
            <td>@user.Id</td>
            <td>@user.Email</td>
        </tr>
    }
</table>
Start up the application and try to access the /ManageUsers route while logged in as a normal user. You'll see this access denied page:
That's because users aren't assigned the Administrator role automatically.
Create a test administrator account
For obvious security reasons, it isn't possible for anyone to register a new administrator account themselves. In fact, the Administrator role doesn't even exist in the database yet!
You can add the Administrator role plus a test administrator account to the database the first time the application starts up. Adding first-time data to the database is called initializing or seeding the database.
Create a new class in the root of the project called SeedData:
SeedData.cs
using System;
using System.Linq;
using System.Threading.Tasks;
using AspNetCoreTodo.Models;
using Microsoft.AspNetCore.Identity;
using Microsoft.EntityFrameworkCore;
using Microsoft.Extensions.DependencyInjection;

namespace AspNetCoreTodo
{
    public static class SeedData
    {
        public static async Task InitializeAsync(
            IServiceProvider services)
        {
            var roleManager = services
                .GetRequiredService<RoleManager<IdentityRole>>();
            await EnsureRolesAsync(roleManager);

            var userManager = services
                .GetRequiredService<UserManager<ApplicationUser>>();
            await EnsureTestAdminAsync(userManager);
        }
    }
}
The InitializeAsync() method uses an IServiceProvider (the collection of services that is set up in the Startup.ConfigureServices() method) to get the RoleManager and UserManager from ASP.NET Core Identity.
Add two more methods below the InitializeAsync() method. First, the EnsureRolesAsync() method:
private static async Task EnsureRolesAsync(
    RoleManager<IdentityRole> roleManager)
{
    var alreadyExists = await roleManager
        .RoleExistsAsync(Constants.AdministratorRole);

    if (alreadyExists) return;

    await roleManager.CreateAsync(
        new IdentityRole(Constants.AdministratorRole));
}
This method checks to see if an Administrator role exists in the database. If not, it creates one. Instead of repeatedly typing the string "Administrator", create a small class called Constants to hold the value:
Constants.cs
namespace AspNetCoreTodo
{
    public static class Constants
    {
        public const string AdministratorRole = "Administrator";
    }
}
If you want, you can update the
ManageUsersControllerto use this constant value as well.
Next, write the EnsureTestAdminAsync() method:
SeedData.cs
private static async Task EnsureTestAdminAsync(
    UserManager<ApplicationUser> userManager)
{
    var testAdmin = await userManager.Users
        .Where(x => x.UserName == "admin@todo.local")
        .SingleOrDefaultAsync();

    if (testAdmin != null) return;

    testAdmin = new ApplicationUser
    {
        UserName = "admin@todo.local",
        Email = "admin@todo.local"
    };
    await userManager.CreateAsync(
        testAdmin, "NotSecure123!!");
    await userManager.AddToRoleAsync(
        testAdmin, Constants.AdministratorRole);
}
If there isn't already a user with the username admin@todo.local in the database, this method will create one and assign a temporary password. After you log in for the first time, you should change the account's password to something secure!
Next, you need to tell your application to run this logic when it starts up. Modify Program.cs and update Main() to call a new method, InitializeDatabase():
Program.cs
public static void Main(string[] args)
{
    var host = BuildWebHost(args);
    InitializeDatabase(host);
    host.Run();
}
Then, add the new method to the class below Main():
private static void InitializeDatabase(IWebHost host)
{
    using (var scope = host.Services.CreateScope())
    {
        var services = scope.ServiceProvider;

        try
        {
            SeedData.InitializeAsync(services).Wait();
        }
        catch (Exception ex)
        {
            var logger = services
                .GetRequiredService<ILogger<Program>>();
            logger.LogError(ex, "Error occurred seeding the DB.");
        }
    }
}
Add this using statement to the top of the file:
using Microsoft.Extensions.DependencyInjection;
This method gets the service collection that SeedData.InitializeAsync() needs and then runs the method to seed the database. If something goes wrong, an error is logged.
Because
InitializeAsync()returns aTask, theWait()method must be used to make sure it finishes before the application starts up. You'd normally useawaitfor this, but for technical reasons you can't useawaitin theProgramclass. This is a rare exception. You should useawaiteverywhere else!
When you start the application next, the admin@todo.local account will be created and assigned the Administrator role. Try logging in with this account, and navigating to http://localhost:5000/ManageUsers. You'll see a list of all users registered for the application.
As an extra challenge, try adding more administration features to this page. For example, you could add a button that gives an administrator the ability to delete a user account.
Check for authorization in a view
The [Authorize] attribute makes it easy to perform an authorization check in a controller or action method, but what if you need to check authorization in a view? For example, it would be nice to display a "Manage users" link in the navigation bar if the logged-in user is an administrator.
You can inject the UserManager directly into a view to do these types of authorization checks. To keep your views clean and organized, create a new partial view that will add an item to the navbar in the layout:
Views/Shared/_AdminActionsPartial.cshtml
@using Microsoft.AspNetCore.Identity
@using AspNetCoreTodo.Models

@inject SignInManager<ApplicationUser> signInManager
@inject UserManager<ApplicationUser> userManager

@if (signInManager.IsSignedIn(User))
{
    var currentUser = await userManager.GetUserAsync(User);

    var isAdmin = currentUser != null
        && await userManager.IsInRoleAsync(
            currentUser,
            Constants.AdministratorRole);

    if (isAdmin)
    {
        <ul class="nav navbar-nav navbar-right">
            <li>
                <a asp-controller="ManageUsers"
                   asp-action="Index">
                   Manage Users
                </a>
            </li>
        </ul>
    }
}
It's conventional to name shared partial views starting with an
_underscore, but it's not required.
This partial view first uses the SignInManager to quickly determine whether the user is logged in. If they aren't, the rest of the view code can be skipped. If there is a logged-in user, the UserManager is used to look up their details and perform an authorization check with IsInRoleAsync(). If all checks succeed and the user is an adminstrator, a Manage users link is added to the navbar.
To include this partial in the main layout, edit _Layout.cshtml and add it in the navbar section:
Views/Shared/_Layout.cshtml
<div class="navbar-collapse collapse">
    <ul class="nav navbar-nav">
        <!-- existing code here -->
    </ul>
    @await Html.PartialAsync("_LoginPartial")
    @await Html.PartialAsync("_AdminActionsPartial")
</div>
When you log in with an administrator account, you'll now see a new item on the top right: